Showing posts with label Mrs Soup. Show all posts

Wednesday, 29 August 2012

Clandestine Cake Club - Olde Sweet Shop

Well, this is almost a month late, but the most recent Clandestine Cake Club I attended was themed 'Ye Olde Sweet Shop'. You can see Sharon's post with all the attending cakes here. My contribution was a Strawberry marshmallow cheesecake. I wanted to make something that included sweets and used sweets as decoration on top, and I'm really happy with the result - this would be fantastic for a kid's party (perhaps in green!) and what you can't tell from the picture is how light this was - definitely light enough (and tasty enough!) to go back for seconds. I based the recipe on my memories of a pudding called pink fluff (most people know this under a variety of names!), which involves mixing jelly and Ideal milk, beating until it's really fluffy, then allowing it to set. This is the same thing, only without the bubbles.

This is a real show-stopper of a cake - and the only limitation with decorations is your imagination (and how well stocked your sweet shop is!)
Ingredients :

200g digestive biscuits (crushed)
100g butter

2/3 packets jelly (pick your flavour/colour!)
500ml greek yogurt
Packet mini-marshmallows (optional)
Sweets to decorate

Melt the butter and mix with the biscuits. Press into the bottom of a deep loose bottomed / springformed tin.

Make up 2 packets of jelly using about 1/3 volume of boiling water specified. Allow to cool a bit (catch it before it sets) and then make up to the full volume with yogurt. Mix in the marshmallows (if you are using them), pour into the tin on top of the base and allow to set. 

Once the yogurt layer has set, make up the remaining jelly using water, allow to cool until just before setting (you don't want to pour it onto the previous layer until it's quite cool otherwise you can melt the yogurt layer a bit). Pour it gently onto the previous layer, and position your sweets in the layer, or wait till it's set and position them on top (I used white chocolate buttons and waited till the layer was almost set and just pushed them in gently so the were slightly immersed, but not completely.)


Saturday, 30 June 2012

Foodie PenPals June

I can't quite believe it's the end of June already. This year is flying past, and this month in particular seems to have disappeared leaving me with the odd sense that I must have done stuff, but with no idea what!
This month I managed to get my Foodie PenPals parcel off in time, rather than having a mad dash at the last minute, and I hope my pen pal enjoyed her things (her post is up here if you want to see what I sent). The parcel I received arrived well before the due date, and was absolutely packed with things! As with last month's parcel it's given me some ideas for thing to put into my next parcel.
Look at all those goodies!

Teresa had shopped with both me and Mr Soup in mind, so there were some lovely savoury things - a chilli grinder which has gone straight into my nicely (recently) organised spice drawer; a box of barley groats, together with a recipe for a soup/stew using them (incorporating 2 of Mr Soup's favorite things - beer and beef, so it'll definitely get made!), some vegetable pate which will probably get cracked open to have with crackers this weekend when we're doing our regular Buffy/Angel marathon.

For me there were some dinky silicone cupcake cups (still to be used), vanilla pods (Mr Soup got very excited about these - I think creme brulee might be in our future...), some cherry liquorice (tasty and unusual - I think I prefer the taste of normal liquorice but have been wanting to try cherry liquorice since seeing Walter on Fringe munching on the stuff). Pineapple and papaya mix - which will be making it's way into a cake fairly shortly, probably as a substitute for candied peel as a variation. A carob/seedy/hemp energy bar which kept me going through a long day, and a strawberry and pepper chocolate bar, which was a very different treat - I've had chilli chocolate before and this balanced the pepper bite, sweet chocolate and slightly sour strawberry taste very nicely. I would recommend!

And finally some homemade granola, which went really well with yogurt, in Mr Soup's smoothies, and mixed in with my morning oats - it was gone in days!

Teresa also sent me a recipe for a lemon-curd sponge which has gone onto my list of things to bake (which seems to be getting longer rather than shorter even though I keep making things!)

I really enjoyed unpacking my parcel and can't quite believe how many things Teresa managed to fit in - Mr Soup and I were really spoilt! 

Sunday, 10 June 2012

Weekly Bake Off - Apricot loaf cake


After several weeks of not participating in the Weekly Bake Off, I was raring to go with this week's bake : Apricot loaf cake. The only ingredient I needed to buy were the dried apricots, and so after picking them up on the way home on Thursday I threw this together after dinner on Thursday night. It is a very simple recipe - everything get put into 1 bowl, mixed and then poured into the loaf tin, so it is very low-stress. It smelt lovely while baking, and we dived straight into it almost as soon as it was out of the oven. 

Mr Soup loves fruit loaf, and this didn't disappoint, being full of apricots, cherries and raisins. I don't think that the icing added much, though it was a nice touch to be able to sprinkle some more apricots on top. I probably wouldn't make this again, but only because I have other recipes for darker fruitloafs, but probably will be adding dried apricots to other fruit cakes in the future.

Saturday, 9 June 2012

Sloe Gin Jelly

Apparently today is Gin Day, and so I thought I would let you know a good idea I had a few weeks ago. Last year we found a large stand of Sloe bushes, and had our eye on them all through autumn, just waiting for the first frost. Unfortunately many other people (or perhaps birds) had the same idea, and when we got to the sloe bushes, there weren't many left. We persevered, and with a bit of jumping (to catch the high branches) and several scratches, we came home with enough sloes to make a bottle of sloe gin. I'll post the recipe when we make another batch this year, but you basically add sugar and gin to your sloes after pricking the skins, and leave them to soak for several months.

We'll be having some of this this evening to celebrate Gin Day (as though we need an excuse!).
 Our sloe gin was stewing away in the back of a cupboard, and a few weeks ago I decided it might be a good idea to filter and bottle it, ending up with a couple of lovely looking bottles of sloe gin (the little bit we sampled was gorgeous!), and a sieve full of sloes pickled in gin. I looked at these, and couldn't bring myself to throw them away, and that's when inspiration struck - I had a batch of cooking apples in for another batch of jelly, and thought why not use these lovely gin-infused fruit to make some jelly - worst case scenario was it would be a waste of an apple and some sugar, and best case I would have discovered something really special and different. Turns out it was a great idea, and the resulting jelly has a lovely delicate taste. If you're making sloe gin this year, I would recommend this as a way of getting the most out of your sloes.

Ingredients :
- drained leftover gin-soaked sloes
- cooking apple(s) chopped (don't bother peeling or coring them)
- sugar
- water
- sterilised jam jars

Put your leftover sloes into a pan, together with a couple of apples (I used about half as much apple as sloes). Cover with water, and bring to the boil. Simmer until the apples are soft and virtually disintegrating. Allow to cool a bit, then strain through a muslin cloth. Discard the fruit pulp that remains and measure the drained liquid. Add about 2/3 the volume of sugar (ie for 600ml of juice, add 400g sugar), and return to the heat. Bring to a rolling boil, and continue to boil until the jelly reaches setting point (test by dropping a few drops onto an ice-cold plate, or resting your spoon on an ice-block and seeing if the drops/liquid in the spoon solidify). Cool slightly and then pour into the sterilised jam jars.

Now you just have to decide whether to keep it all for yourself, or give some away to deserving friends!

Sunday, 13 May 2012

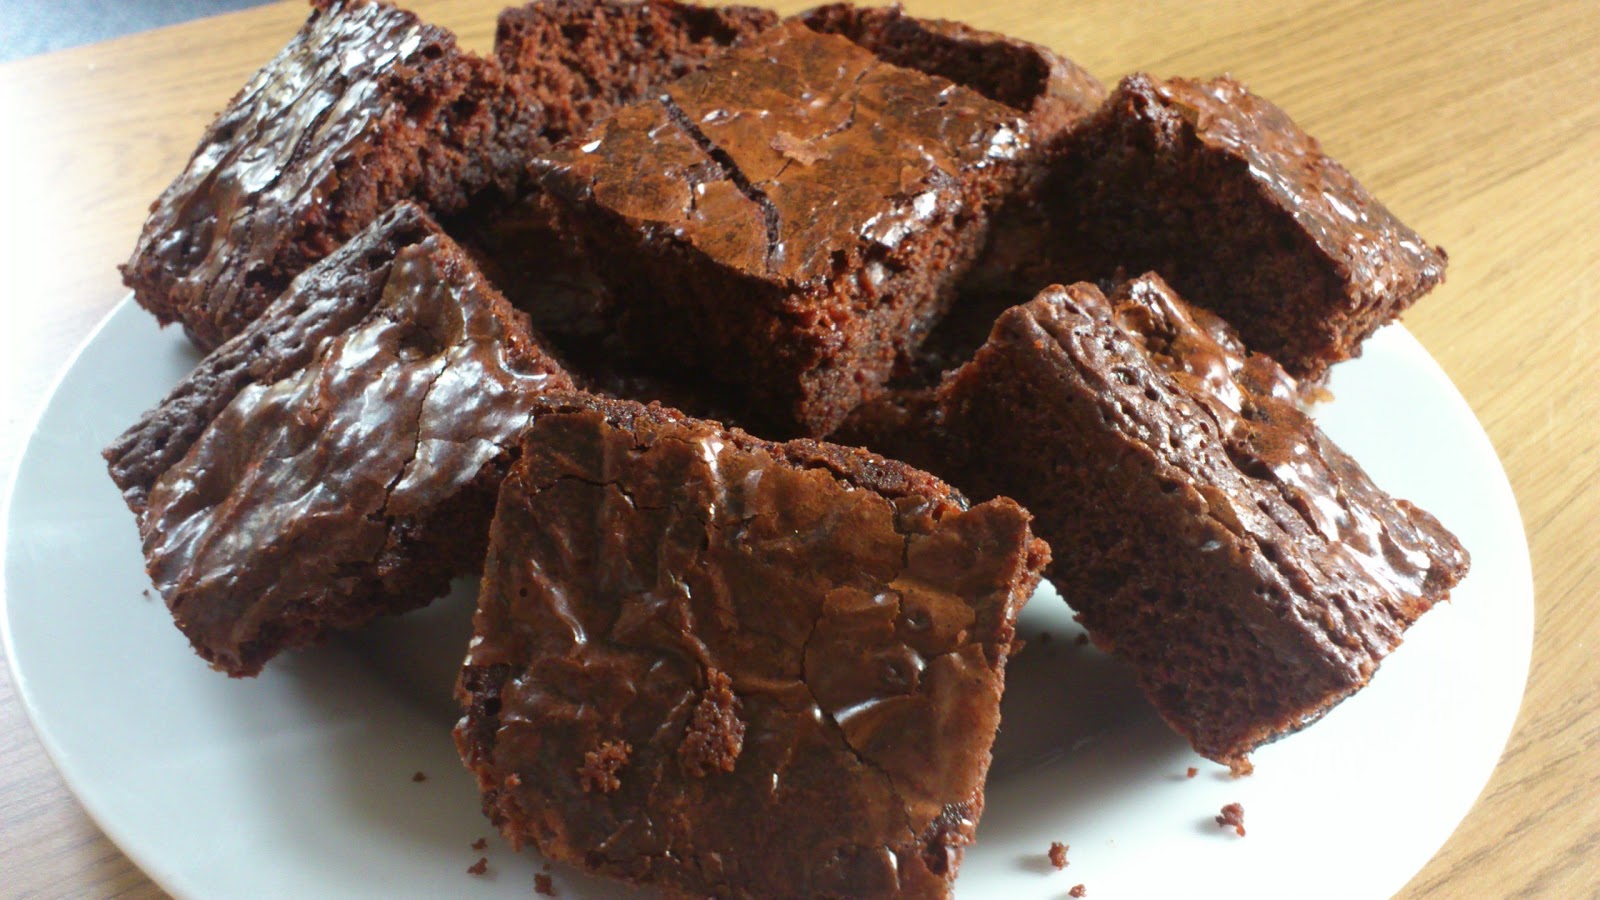
Dark Indulgent Chocolate and Cherry Brownies

This week's Weekly Bake Off choice was a chocolate and walnut brownie recipe. Not being a big fan of walnuts, I was initially just going to replace them with pecan nuts, and I'm sure that would have been a very nice substitution. However, I recently made some chocolate biscuits with sour, dried cherries in them, and they were probably the nicest biscuits I've ever made! So the choice was made - chocolate and cherry brownies it would be.
I halved the ingredients specified in the book after seeing just how much chocolate was involved - MB is not shy with the size of her bakes! I did a direct substitution for the walnuts, and used the same weight of cherries as I would have walnuts.

The recipe was fairly straightforward - I was a bit worried by the rather small amount of flour in the recipe, but the brownies turned out really well - they are a good moist bake, and the bitter cherries set off the chocolate very well (this may have been a bit too sweet otherwise I think). And even though the cherries are dried, they become moist during the baking. 

Friday, 11 May 2012

Herman the German

We've had a house guest the last couple of weeks - I was the lucky recipient of a portion of a work friend's Friendship cake. Apparently Herman is quite famous, and most of the baking world seems to have had him to stay at some point or other, growing him a bit, then dividing him into a portion to bake with, and giving the rest away to friends. At this rate, I would estimate that the world would be drowning (quite literally) in Herman beofre too long.
Obviously some people are not passing on their Herman as expected (evidenced by the continuing lack of a yeasty smelly tide swallowing Britain), but I found 3 lucky recipients, and baby Hermans were distributed round Leeds, and one even made it all the way to Hull, where apparently there is a waiting list for his offspring!

Having spent plenty of time growing all sorts of single celled organisms in the lab, I probably wasn't as intimidated by Herman as I know a few people have been. He is essentially a live yeast culture, and so I didn't stick too carefully to the care instructions - he was stirred every day, but feeding might have occurred at slightly less regular intervals than suggested, and when it came time to bake him, I made sure he was fed the day before, and then just used a cup of him as one of the ingredients in the cake mix. I've kept the remaining mix, and will have a go at freezing him and bringing him back to life - it should work - I'll update at a later point if it does. I'm also rather keen to see if Herman can be adapted into a bread culture - I'll be tring that over the next couple of weeks too and see if he's any good at using for sourdough bread. While Herman was apparently started with dry yeast, I am guessing he's been around for so long that he's more wild yeast (in a domesticated form) than commercially available stuff, and that's one of the things that makes sourdough so tasty. Again, I'll report back with the results, but for now, here is the result of my baking with Herman.

Ingredients:

1 cup plain flour
1 cup Herman
1/2 cup brown sugar (I used brown cane sugar, but light muscovado would be good too)
1/4 cup oil
2Tbsp butter
1 egg
1 tsp baking powder
1 tsp vanilla essence

and then add whatever you like ... I used a baking apple, some dried dates (you could use some raisins), mixed spice and cinnamon.

I mixed all the base ingredients together, and then added the extra ingredients by feel/look - that's one of the good things about Herman - you can add as much or as little as you want. Next time I make a Herman I'll probably add a lot more spice and try an almost ginger loaf kind of cake.
Herman get put in a cake tin (whatever shape you fancy, though try not to have him too thin), and bake at 180ºC for about 45 minutes - check after half an hour using a toothpick/clean knife and test every 10 minutes until it comes out clean. I used a bit of butter and sugar as a glaze just by sprinking the sugar on top, and pouring some melted butter over about 15 minutes before the end of baking to make a crunchy topping. 
 

Sunday, 29 April 2012

Ginger and Treacle Spiced Traybake

After not participating in last week's Weekly Bake Off thanks to cake overload (Lemon and Lavender Battenberg for work and an Opera Cake for Clandestine Cake Club), I was really happy to see that this week's bake was something I really fancied baking and eating!
I love the addition of chopped preserved ginger on top of this cake
I love ginger in virtually any form - ginger nuts are one of my favorite biscuits, and my first creative baking attempt (which prompted the blog hijack) was chocolate and ginger biscotti (yum!). (I also enjoy ginger in a savoury form - salmon with soy and ginger is a regular feature in the Soup household). This recipe also is a very good way to use up some of the black treacle you might haveleft over from Christmas.
In addition to the allspice and mixed spice I added some extra ginger powder. The chunks of preserved ginger in the cake are a lovely surprise!
This traybake was incredibly easy to make - everything weighed into the same bowl and then mixed and poured into the lined tin. The icing was equally straightforward (and a nice use of the syrup the preserved ginger is kept in). I was worried it might be a bit heavy with the black treacle, but the cake is moist and light.
I just couldn't wait for the icing to set all the way, but quite like the look of the icing oozing down the side of the cake. These slices didn't last long after this picture was taken.
We were very happy with this cake, and it came at a good time - a nice warming spiced cake (I added some extra ginger powder to the batter) on a cold, rainy afternoon when one of the Soups is all bunged up with cold - a healthy dose of ginger was just what the doctor ordered!

Friday, 27 April 2012

Lavender and Lemon Battenberg

A few months ago a friend at work proposed a baking challenge - she picked something most people wouldn't normally bake and that would be a bit technically challenging. Despite this, 16 of us signed up for it, and since we decided that we'd take turns with the tin (specially bought for the challenge, and provided as the prize), this means we're in for 4 months of eating battenberg!

This is my entry - look at me giving away the final outcome and killing the suspense!
Some people have gone for a traditional approach, but there have also been some very exciting combinations - the most exotic colour combination so far was yellow and (very bright) blue (vanilla and blueberry), and the very first contribution was coated (all four sides!) in chocolate. (I happen to know there's something even more exotic and stylish on the cards and am very excited to see next week's cake!)

The other thing that has characterised this challenge has been the level of stress. In some ways it's been more of a Battenberg Break-Down than a Bake-Off! I know several people have scapped their first attempt and remade it, and the tin (link to Amazon because I forgot to take a picture of it!) presented endless problems too. It doesn't have a non-stick coating, and once you've baked your cake, it can be very hard to get the pieces out without a problem. I had my own mini-crisis when applying the marzipan at 11pm the night before when all I wanted to do was forget the cake and go to bed! Luckily the marzipan coating wasn't too difficult and I didn't end up throwing cake all over the kitchen!

I decided to go with a traditional-look Battenberg, but with a non-traditional flavour, and used lavender for the pink quarters and lemon for the yellow quarters.  I'd been playing with the idea of a lavender sponge for a while, and almost made a lavender opera cake for the Headingley Clandestine Cake Club event last week, so had some ideas about how best to flavour the cake, and was almost very please with how it turned out... (you'll see why it was 'almost' at the end!)

Sponge - standard recipe (I was surprised when speaking to people how few people know this very easy technique for making a sponge!) :
Break your eggs into a bowl and weigh them (I used 3 for the size of the tin I was using and that's about right for a medium cake)
In a separate bowl weigh out an equal quantity of butter (at room temperature - if it's chilled oyu might want to pop it in the microwave for a few seconds to soften it)
Add an equal weight of caster sugar.
Cream the butter and sugar together until light
Add an equal quantity of self raising flour - I weigh mine separately and then add a bit of flour and an egg, beat, then a bit more flour and another egg etc.


Then pour into a greased, lined tin and bake at 180 ºC until a toothpick/knife comes out clean
 
For the lavender sponge I used lavender infused caster sugar prepared by adding 2tsp lavender flowers (dried or fresh) to 100g caster sugar, and leaving to infuse (shaking every few days) for a week or longer. Sieve before using to remove the lavender flowers - those that pass through the sieve are fine to include in the cake, you just don't want big chunks! I also used a liquid food colouring, in liberal quantities, having been warned that it might fade when baking. When it went into the oven it was a very dark pink...
 
Once the cake had cooled, I prepared a lemon syrup (1/4 cup each of caster sugar and water heated till boiling in a panwith the juice of half a lemon). I repeated the process for a lavender syrup and boiled lavender flowers with the water, caster sugar and lemon juice, then passed the syrup through a sieve to remove the lavender flowers. 

I poured the syrups over the cake quarters, and then assembled the cake. First I stuck the quarters together with apricot jam. I then rolled out the marzipan using icing sugar on the counter to stop it sticking. I flipped the marzipan over, clean side down onto a sheet of baking paper, and smoothed a layer of apricot jam over the inside. I placed the sponge onto the marzipan at one end, and trimmed the marzipan to about 2cm from the edge (to form the seam). I then used the baking paper to roll the battenberg up in the marzipan - this worked really effectively and I can add instructions if anyone is interested! (Another trick is to keep your marzipan cool). Once it was rolled up I trimmed the edges, and scored the top, and there it was.
 
And the 'almost' happy bit... was down to the colour! It's not as obvious in the pictures (though the one below comes close...), but my dark pink batter turned into a bright orange sponge! I decided to go ahead with it as I didn't have any other food colouring to use, but it did look like it might be a carrot battenberg! (Apparently paste colouring is far more reliable and less likely to fade/change colour.) The taste was incredible - a really light, delicate flavour and I was very happy with the combination of lavender, lemon and marzipan - will definitely use it again!  

Doesn't this look like it might be a carrot or orange flavoured cake?!

Sunday, 22 April 2012

Opera Cake - Clandestine Cake Club Headingley

This is a cake for a Clandestine Cake Club event. The theme was 'Je Ne Sais Quoi - all things French' and after a bit of research, I decided to make an Opera Cake. This is the first cake recipe I feel I truly 'own' having adapted, merged and quite frankly, just winged it in places to create this cake (all based on the general principles of an Opera cake). I think there is a parallel that can be drawn with the work I used to do, in lab-based research. Once you understand the principles behind a protocol (or recipe) and why each step is there, that's when you can start to modify it for your own purposes. (Also for anyone familiar with lab work - if you can put together a Western blot, an Opera cake is, well, a piece of cake!)

This Clandestine Cake Club meeting was held at The Bowery in Headingley, and was quite a bit smaller than the last event I attended (I'm sure the truly horrible weather contributed to several cancellations, but an evening with coffee and cake in a snug coffeeshop was perfect!). 6 cakes, and 8 people in total meant we all got to try each cake, so I didn't have any regrets about being too full with 10 cakes still to try this time!
The spread of cakes - a cake version of a Tarte Tatin arrived still warm a few minutes after I took this picture, bringing the total to 6 cakes. The quite unusual Dan Lepard fig, red wine and honey loaf was probably my favorite, though the profiterole cake was lovely, and the other chocolate cakes were both gorgeous!
Opera cakes are quite impressive, and I was rather surprised by how easy it actually was - each individual element is something most people who bake will have made before, and assembling it is not as fiddly as you might think - the trick is in cutting the edge off the cake at the end, leaving a lovely neat profile, and eliminating untidy edges.

Don't be put off by the long list of ingredients/elements of the cake - the syrup and buttercream can both be made while the sponge is baking, and the ganache is very quick to make too.

Chocolate/almond sponge
4 eggs
220g butter
220g caster sugar
55g ground almonds
165g self raising flour
1tsp baking powder
4 Tbsp cocoa powder

Spoon a thin layer of the mixture into a greased, lined square/rectangular cake tin. You want this to be about 5mm thick or so - I used about 1/3 of the mix in a 10 x 6.5 inches (25x16cm). Try to get the top as smooth as possible, and the layer of batter as evenly spread - otherwise you will end up with a wonky cake! Bake at 180ºC for about 8-10 minutes - once the top looks cooked, you're probably about right - keep an eye on it and use a toothpick to check. I only have one tin the right size, so cooked the 3 layers one after the other, and that worked well. Once you take a layer out of the oven, use the greasproof paper to lift it out of the tin, and leave on a wire rack to cool.

Coffee syrup
150ml caster sugar
150ml water
2 heaped teaspoons instant coffee

Boil sugar and water together in a pan until the sugar has dissolved, add coffee powder and allow to cool. Reserve a little syrup for the buttercream.
Turn the cooled sponge layers over and remove the greaseproof paper, then pour the syrup over the sponge layers - the better coverage you can get the better.
Didn't quite manage to cover the entire cake - pretty pattern though! I'd turned the cake over, but left it on the paper to catch any run-through of syrup.
Coffee buttercream
150g Icing sugar
150g Butter
3 Tbsp Coffee Syrup

Cream the butter and sugar together in a mixing bowl. Add a little of the coffee syrup until the buttercream is the right flavour for you. Allow to cool in the fridge for a bit if too runny to spread on the cake. Put your first layer of sponge onto your serving plate (if you're serving it as a whole cake). Spread about half the buttercream over the sponge, and place the second layer on top of the buttercream. This is the fiddliest part of the process, and it helps to have someone else on hand to help if you're stuck with both hands full of cake and need something positioning! Spread the rest of the buttercream over this layer, and then place the final layer of sponge on top.
At this stage it looks a bit messy - not to worry though! Use the buttercream to get the layers as level as possible.
Chocolate ganache
100g Chocolate
45g Salted Butter
A few Tbsp smooth apricot jam, heated

Melt chocolate and butter together very gently in a double boiler (I use a plastic bowl that fits loosely over a pan of hot water without touching the water). Spread a thin layer of the heated apricot jam over the top of the cake, to ensure the ganache spreads evenly. Once the butter and chocolate are melted, stir together gently, allow to cool slightly, then pour over the cake. You may need to spread the ganache a little to ensure you cover the top of the cake completely. Dont' worry about drips down the side being untidy - this will be fixed in the next step!
Put the cake in the fridge for a few hours to allow the ganache to set.

Heat a sharp knife (preferably something like a butcher's knife) by running under some hot water. (Repeat between cuts). Slice off the edges of the cake, to leave a clean edge (you could cut into individual portions at this stage if required). Transfer the cake to the serving dish, and keep refigerated (in a sealed container if necessary) until about an hour before serving.
The final product! I think for presentation in the future I would do individual slices, which looked incredible (none survived long enough to photograph...).
And then sit back and enjoy all the compliments on your cake! 

Sunday, 15 April 2012

Double Chocolate and Sour Cherry Biscuits

In the absence of the Weekly Bake-Off for a week, I decided to take the opportunity to make some biscuits from one of my other Christmas presents - The Boy Who Bakes' cook book.
I had originally planned to make macarons, but wanted something quick and easy for Friday evening and so settled on the Double Chocolate and Sour Cherry biscuits instead. The recipe was fairly straightforward - both melted chocolate and cocoa go into the batter, making it extra chocolatey, and then chopped chocolate and the dried, sour cherries are stirred in, so the final result is a very chocolatey biscuit with chunks of sour cherry, which compliments the sweetness of the chocolate. The batter is spooned onto the baking tray, and spreads a bit as it's cooking, resulting in beautifully big, lumpy, rustic looking biscuits (I like my biscuits to look like they're full of chunks of chocolate)!

The taste did not disappoint, and I will be making these again. They took less than half an hour to make, and were good enough for any company, so could be good emergency bake, though I'd probably never have enough chocoloate in the house so they would need a trip to the shops! Despite making only half the mix, it made 15 biscuits, and we still have a few left at the end of the weekend (due to extreme self restraint). 

Sunday, 1 April 2012

Weekly Bake Off - Hot Cross Buns

With Easter rapidly approaching I've shown great restraint (mostly inspired by the huge amount of cake there has been in the house) in not buying any hot cross buns yet. Mr Soup and I are big fans, and quite capable of eating a pack together in the space of a day, so it's better not to have the temptation there...
But after this week's Weekly Bake Off challenge, I suspect that while Hot Cross Buns will remain on the menu, shop-bought ones won't, as they simply don't measure up to this tasty recipe.
 Having seen everyone else's pictures start to go up through the week, I was rather keen on having some Hot Cross Buns for breakfast on Saturday morning. In order to get the timings right, I made the mix, and left it to rise for the first time overnight in a warmed oven (reasoning that the oven would cool after an hour or so, and the yeast would not get completely out of control). This strategy worked, and on Saturday morning I woke to a big bowl full of risen dough. This was kneaded for a few minutes, and then I made the buns and put them to rise for a second time. Abking was only about 15 minutes, so about an hour after getting up, we had hot, fresh Hot Cross Buns - pure indulgence.

About the only thing I will change when making these again is to add a bit more spice.

Sunday, 18 March 2012

Weekly Bake Off - Lemon Yogurt Cake

Yogurt is one of those words whose pronounciation divides people, rather like scone and data. I tend to flip between the two - having grown up in a culture with equal parts American and British influence, I have a confused vocabulary - after 5 years in the UK I still forget myself at times and refer to trousers as pants!

However you choose to pronounce it, this week's Weekly Bake Off recipe is a lovely cake. The yogurt does make it rather dense, especially if, like me, you don't bake it for quite long enough, but it has a lovely springy texture, and is beautifully moist.

Having learnt to not mess with Mary's recipes, the only modification I made was adding a squeeze of lemon juice to the cake batter to ensure a good lemony flavour to the cake. I also only had a 23cm diameter deep cake tin, so my cake is a bit thinner than it should be (and also explains why I slightly undercooked it - I should have gone for the 1hr15min, but got nervous about overcooking it at 1hr05min, so pulled it out early). As a result it sank a bit in the middle, and I ended up with a puddle of icing in the middle.

However, a day later, and we've already had a slice each for pudding after dinner, and a slice with tea this afternoon, so I'd judge this cake a success, and a nice moist change from a normal lemon sponge.
In other news, this Thursday I'll be attending my first Clandestine Cake Club meeting in Pudsey - I'm very excited to be meeting at least one other Weekly Baker, and many other cake-lovers!

Sunday, 26 February 2012

Weekly Bake Off - Cupcakes

I have a confession to make. A dire and dreadful confession...

Despite being an avid baker, I'm just not that into cupcakes. The rest of the world seems cupcake mad, and looking at the other beautiful entries on this week's Weekly Bake Off, I can almost see the appeal. They are lovely little things, but I can't quite get over the feeling that they're not for me. Cakes should be large and substantial, and fill a plate!

That's not to say I don't make cupcakes when the occasion calls for it. It just doesn't call that often.
That's why this week's bake wasn't a huge thrill for me - and with my preference for coffee or chocolate flavours outweighed by the necessity of following MB's recipe exactly, I wasn't terribly excited about the final product, which is why despite making these on Wednesday and having friends round to eat them on Thursday the blog post is only being typed on Sunday evening!

The bake was easy - throw everything in a bowl, mix, spoon into casings and bake. I'd misjudged how much icing sugar I had, so had to scale down my icing to about 1/3 of the quantity, but since the cupcakes were quite sweet anyway, I think a thinner layer of icing worked well.

Any baking book should have a cupcake recipe in it, but I'm glad this is out of the way now. Onto more exciting bakes!

(I made the Orange Scotch Pancakes (p127) this morning for breakfast - no time for a photo as they were scoffed almost as fast as they came out of the frying pan! Will definitely be making them again.)

Sunday, 11 December 2011

Christmas Pudding


Here is my super-easy Christmas pudding recipe. For some reason people assume that Christmas pudding is difficult to make and takes ages - the prep time on this is only about 10 minutes (with 6 hours cooking time) - once you've seen how easy it is I doubt you'll go back to store-bought!

This is an old family recipe - as long as I can remember this was presented at Christmas time, with flaming brandy (it's the only way!) and cold brandy butter to accompany. When I was much younger, there was always a silver coin in my slice - I suspect, with hindsight, that the silver coin was slipped in after dishing, but as a child it all added to the magic of Christmas!

(If you do decide to put coins into your pudding, pop them in a pot of boiling water and boil them for about 10 minutes first - also use largish coins - 50p pieces would be best - and warn everyone that they are in there! I would probably use a knife to make insertions into the cooked pudding and insert them after cooking to get an even distribution.)

I made this pudding as my contribution to my first Christmas meal with Mr Soup's family - I don't know who was most nervous about it (me, him or his mother!), and we're fairly sure there was a store-bought backup - but it was a resounding success, and even had people coming back for seconds (after the spread on offer that was quite a feat!) There will be a repeat performance this year by popular request.

I normally make this a month or two in advance, and do a lot of feeding with the remaining brandy, but it's quite possible to serve immediately after steaming it.

The recipe is from a Victorian Cookery and Housekeeping book, and the resulting pudding is considerably lighter than we are used to nowadays - don't be worried - it still tastes amazing. There is also no added sugar - all the sweetness is from the fruit. This recipe is scaled down from the original - which made 3 large puddings, and used every mixing bowl I had!) These quantities are just right for one large pudding.

Ingredients :
150g raisins (make sure you get deseeded!)
150g currants
35g sultanas
120g mixed peel
(This year I bought a fruit mix with raisins, sultanas, mixed peel, cherries etc and used 450g of that instead of measuring out the individual ingredients)
150g suet
115g bread crumbs
half tsp ground nutmeg (I've also used mixed spice in the past)
100g plain flour
165ml milk
3 large eggs
85ml brandy

Mix together the dried fruit, suet, bread crumbs, flour and spice. In a separate bowl beat the eggs, milk and brandy together. Pour the wet ingredients into the fruit mix, mix well and put the mix into your pudding bowl. Tie a cloth, or greaseproof paper over the top, and boil/simmer with the lid on for about 6 hours - I do this overnight on the low setting of my slow cooker. The pudding can be turned out and served immediately, or stored, with a bit of brandy poured over it every week or two till Christmas! If you store the pudding, all that's needed on the day is to boil it again (to heat it through) for half an hour to an hour.

Sunday, 27 November 2011

Blog Hijack!

Hello All

Since Mr Soup has been rather busy with work (he works in a different city and so spends half the week away from home), activity on the Soup front has been rather quiet of late.

And this has led me (Mrs SoupTuesday) to stage a coup and hijack the blog. (This has mostly been driven by wanting to participate in the Great Food Blogger Cookie Swap!)


You have probably all gathered by now that Mr Soup is a man of imprecise measures and mostly savoury tastes. I on the other hand am rather more suited to baking - after years working in a lab nothing makes me happier than having a precise recipe to follow, weighing things out to the nearest gram (far better than micrograms!) and assembling complicated structures. Team Soup is nothing if not efficient in our use of talents, so the baking, tricky deserts and preserves fall to me. (Yes, I was the responsible party in all that boiling sugar activity earlier in the year...)

This isn't a complete coup of course - Mr Soup will still be posting most of the recipes as he does the lion's share of the cooking (I'm a very lucky girl!) - but I'll be popping onto the scene every so often with something a little different - most likely sweet - to tempt you with.